
How to design a sealed subwoofer box
Design a sealed enclosure the easiest way possible
If you want to learn how to design a sealed subwoofer box, this article is for you. And when I said article I meant this video. Because I explain everything in that video, so go watch that. In this article I’m just going to add some minor commentary. In addition, here is also the place where you can download the excel spreadsheet. Finally, you will find the building plans for the active subwoofer mentioned in the video.
Excel spreadsheet
If you came here just to download the excel spreadsheet, I’m just going to place this at the beginning of the article.
Here is the Download link.
If it doesn’t download automatically, just right click and save as. This excel spreadsheet is very versatile. While it does not have all the bells and whistles, it get’s the job done super fast. Even today I still use it in the detriment of other sophisticated software. You just enter 3 parameters and you are done. While this article was meant to help you how to design a sealed subwoofer, this is especially fast for bass reflex boxes. When you are searching for a particular driver this is very handy, to quickly check the box requirement for each driver.
How to design loudspeakers - video courses


As a side note, I want to mention something which I missed in the video. If you want to model the response of a box with multiple drivers, you can do that. While I have not implemented an option to select the number of drivers, I simply do this trick. When you enter the speaker parameters, enter Fs and Qts like normal and for Vas multiply the Vas number by how many drivers you have. And that’s it. As a result, if you have 2 drivers just double the Vas value and keep Fs and Qts the same.
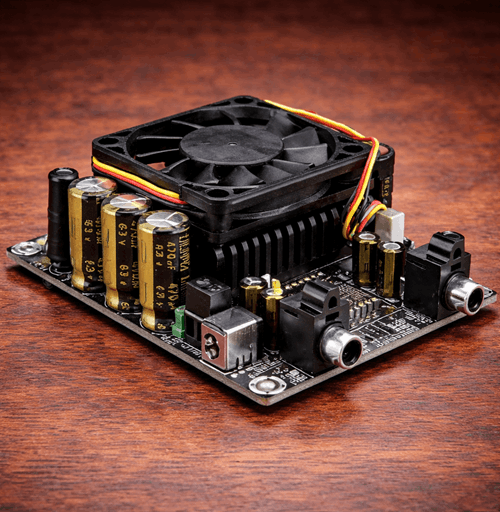
Parts list for active subwoofer project
Besides the 18 mm MDF we are using. Here are the 3 additional parts that you need. I’m going to list links for EU and US buyers. These are all affiliate paid links :
- Europe (Sound Imports) :
- United States (Parts Express)
- United States (Amazon)
Seems like a short parts list, but this is a simple project, and all the complex stuff is integrated in the plate amplifier anyway.
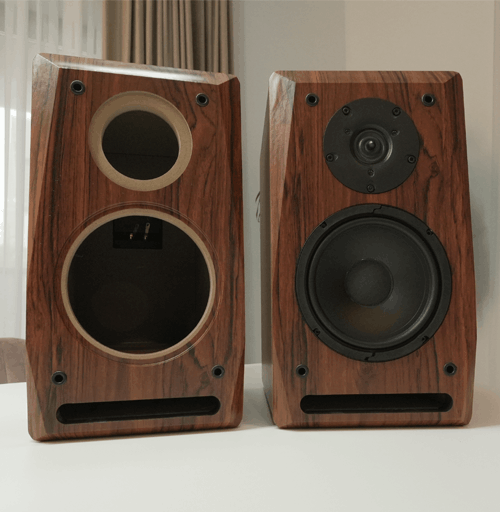
How to design a sealed subwoofer – Enclosure overview
First of all, I want begin by letting you know that I used 18 mm MDF. Secondly, I want to swiftly post a picture with the overall dimensions. While this sub was meant to be a small one, the fact that the amp needs a separate air tight chamber, makes this box larger than it needs to be. As a result, even if I meant to make a small sub, this might not be that small after all. So check out the overall external dimensions.

So, the external dimensions are 300 x 292 x 446 mm (W x H x D). The front panel is small in my book, but the overall enclosure is pretty deep. In conclusion, please check this before you decide it’s a small box or not.
We settled on 23 liters of internal volume. However, if you measure the internal volume of the chamber the speaker goes into and subtract the volume displaced by the speaker, you will get around 18 liters. This is because we are going to fill it up with damping material and the perceived volume will go up significantly. An estimate of 23 liters perceived volume is probably very accurate.
Panel dimensions
While we discussed how to design a sealed subwoofer in the YouTube video, here I’m going to give you the exact dimensions of the panels so you can build this project without any calculations.
Here is a list of the panels dimensions :
- Front / Back : 300 x 292 mm
- Top / Bottom : 410 x 300 mm
- Sides : 410 x 256 mm
- Internal panel : 256 x 264 mm
Next, I’m going to list the drawings of all the panels, so you know how to make the cutouts and where to place the internal panel:


I think it’s straightforward now how the panels puzzle together. However, there is something I want to mention. The internal panels I made it 10 mm thick, to get the box size to a minimum. This might be an inconvenience to buy MDF of different thicknesses (10 and 18 mm). If you want, you could place an 18 mm panel there, in the same position and eat from the internal volume of the speaker chamber. It won’t make that much of a difference. In addition, you might want to consider predrilling some holes in this panel to route the wires from the amp to the speaker. Use some silicone in that spot so there is no air leakage. And that’s pretty much it. Have fun building!
You May also Like


Learn loudspeaker design from scratch

12 comments
hello, your excel spreadsheet dosent work. it wont calculate it. the grey boxes want me to type in some numbers. but that dosent make anysense. im using it on a windows 10 computer. and i downloadet the files in to my desktop
Upload a screenshot somewhere and send me the link, so I can tell what’s wrong.
Great info., all around Marius! I have taken a few of your courses on Edemy and they have been great. In fact, I have picked up a bit of a speaker bug since I first took your course in the middle of Covid and 3 speaker pairs later.. here I am, my first sub design!
A few questions/need your thoughts on subs:
– I noticed that your 3-way speaker design has some insulation on the inside surfaces. However, there is none here. Is any insulation needed in a sub?
– I assume the ‘Golden Rule’ does NOT apply to a sub? It can be a square cube (most retail subs are!)?
Thanks again
Steve
Hello! For floor standing speakers you pretty much need damping material as the chance of a standing wave forming is pretty high. You are probably referring to those kind of speakers. However, a bass reflex subwoofer can get along without damping material just fine. And yes, you can skip the golden rule for subwoofer design. The wavelength of bass frequencies is very long and standing waves cannot form inside a subwoofer box (unless it’s super large, several meters). So, that’s why you see subwoofers with square baffles and such. I suggest avoid making a cube and just stick to a square face only.
Thanks a lot! Very helpful. I just thought of a last question for you. Am looking at the Dayton RSS265HF-4 and it has an EBP of 48.3 Hz. Close to 50 Hz but still below which implies that it should be a sealed enclosure. Yet, Parts-Express site and talking to them as well, they say you can either way: sealed or ported. Your thoughts? It will be a home theatre application. Last one! Tks again!
It will work just fine in a ported enclosure.
Great! Thanks again. I’ve subscribed to your Youtube channel as you have some very helpful and educational info. – please keep it going!
Many many thanks for your info both written and video!
I suppose my first diy 3-way was bad…really bad…so corrections with GRS drivers later.
But now I have some unknown drivers: 12″ woofer and 2 sets of 8″ woofers and 2 tweeters.
Got me a DATs v3 and with T/S parameters indicates that the Qts values are with all woofers around 0,6, and want to use 8″ woofers for this project.
So sealed box.
But the question with this noob, is: suppose I can use your box modeling to determinate the 2-way enclosure, can’t I?
Therefore the box would be 50l with Qtc being 0,8. and stuffed dampening material a lot of rockwool???
Hi, I used your calculator and factored in a 6.5″ subwoofer. The volume of the box should be about 3.74 litres for Qts of 0.7.
I think there is something wrong because that would mean a very, very small box.
Can you confirm?
Hello! You probably mean for Qtc of 0.7. But, yeah, the box size requirements can be very low if your speaker has low Qts or low Vas, or both.
Hi, rganks for the interesting article. What are the :
Vb
QL
Fb
F3
in the Bass Reflex sheet under Box Parameters, they require inputs as opposed to the sealed Box you show in the video, maybe you could add comments to the cells?
You can go ahead and watch this video to clear things up: https://youtu.be/Vf9ApmMFKTg