
DIY Bluetooth speaker amplifier – High power 2 x 100W – 8h playtime
How to make a loud portable speaker?
Well, the first thing you need to be concerned about is the amplification side. We’re gonna cover a DIY Bluetooth speaker amplifier that will definitely put a smile on your face. Why is this important? Because you see all these plug and play solutions which are not extensively thought out. Yes, they are simple to install, but let me tell you what’s the problem. Why do you rate an amplifier board at 24V and include a 12V battery board to go along with it? Yes, it will play sound, but as soon as the battery loses a little juice the amp starts distorting because the amp is not meant to be played at such low voltage. Not to mention that the rated power is never achieved with 12V.
In conclusion, what are we going to do? We are going to make everything from scratch. So no plug and pluy stuff. Only some head scratching, patience, tinkering and hopefully, if we don’t screw anything up, a great result. We want a DIY Bluetooth speaker amplifier which will be : high power, capable of driving decent speakers, and enough batteries for a usable playtime.
Parts list and schematic for the portable amplifier
Because this is no plug and play setup, make sure you have your soldering iron ready and prepare to get your hands dirty. Following up will be the circuit schematic of the whole thing. This should be self explanatory by itself, but I take each piece one by one and explain what it does and with what you might replace it with.

This is how everything fits together. Now it’s time for the components list :
Amazon affiliate paid links
- Universal 3S-13S BMS
- Panasonic NCR 18650B 3400mAh – 14 pieces
- 5.5×2.5 mm DC jack
- 5.5×2.1 mm DC female socket
- 32V/5V DC/DC Converter – Aimtec AMSR1-7805-NZ
- 5V/5V DC Isolator – Aimtec DC1S-0505S
- Battery level indicator
- 36V / 2A OFF-(ON) Switch
- 24V / 5A ON-ON Switch
- Bluetooth module – XY-BT-MINI
- 29.4V / 2A Charger
- Short jack – RCA cable
I added some links to the various items. Remember, you can choose whatever combinations you want in making your DIY Bluetooth speaker amplifier. Next, I will explain what each item does. As a result, you will understand better and maybe use different items to suit your needs better.
Battery pack
The battery pack is the most difficult part to pull off. You also need a spot welder and some nickel strips to make the connections between cells. If you don’t have any of those, you can buy a 29.4V, ready made, battery pack, and that’s the end of it. Here are some pics with how I did it, to give you an idea :
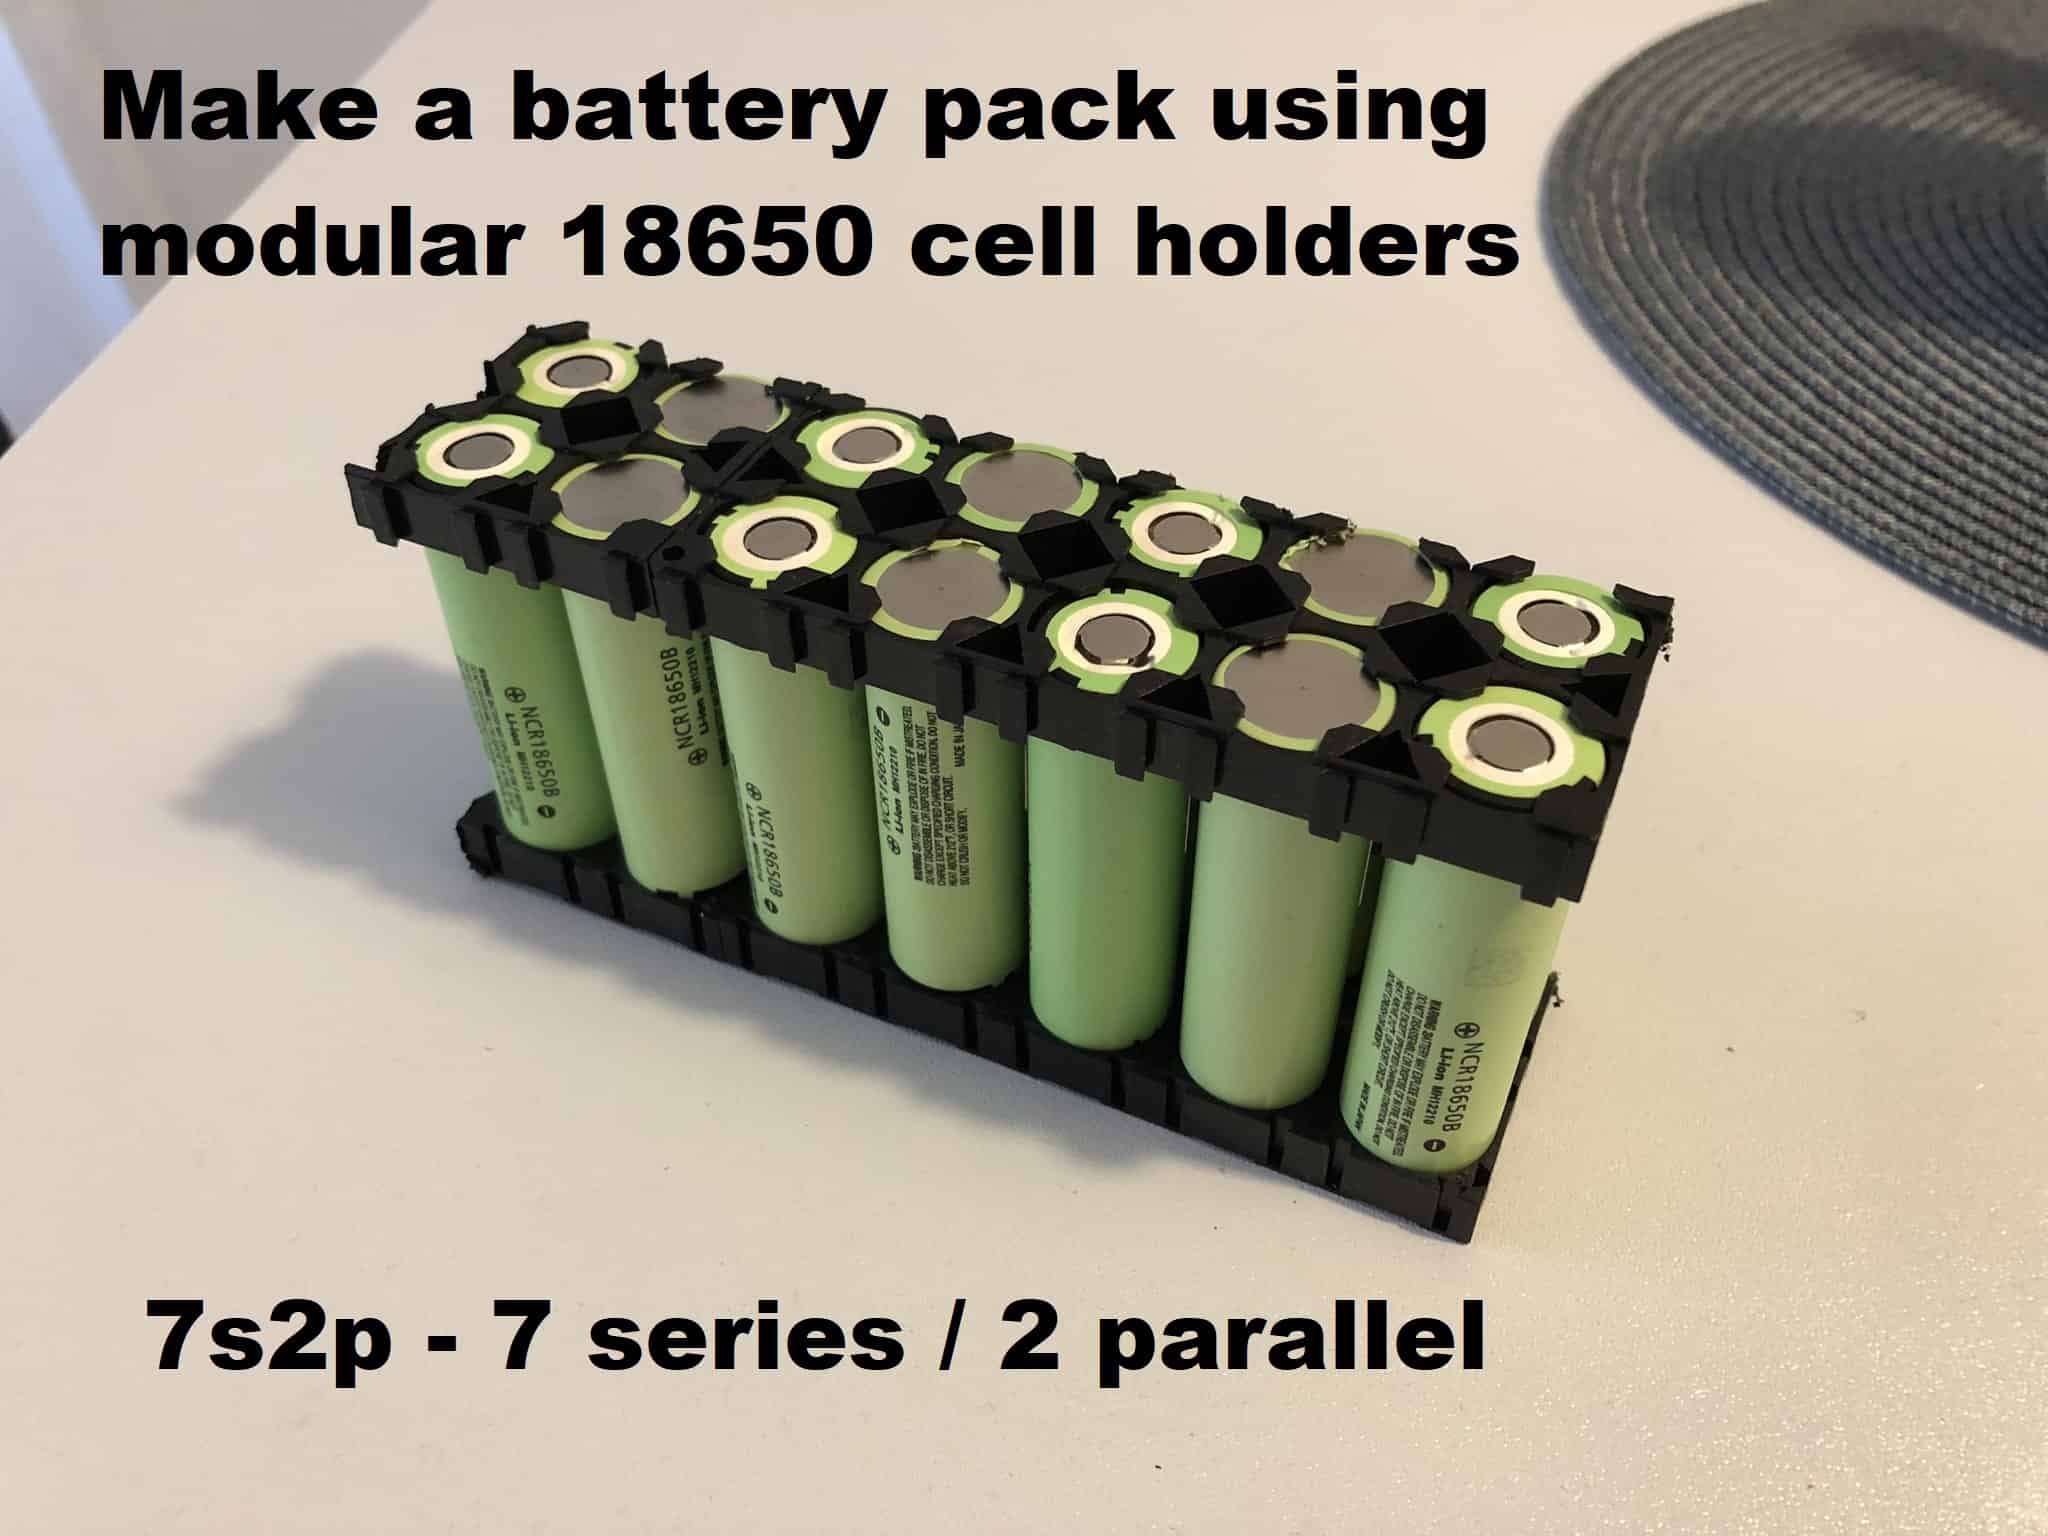

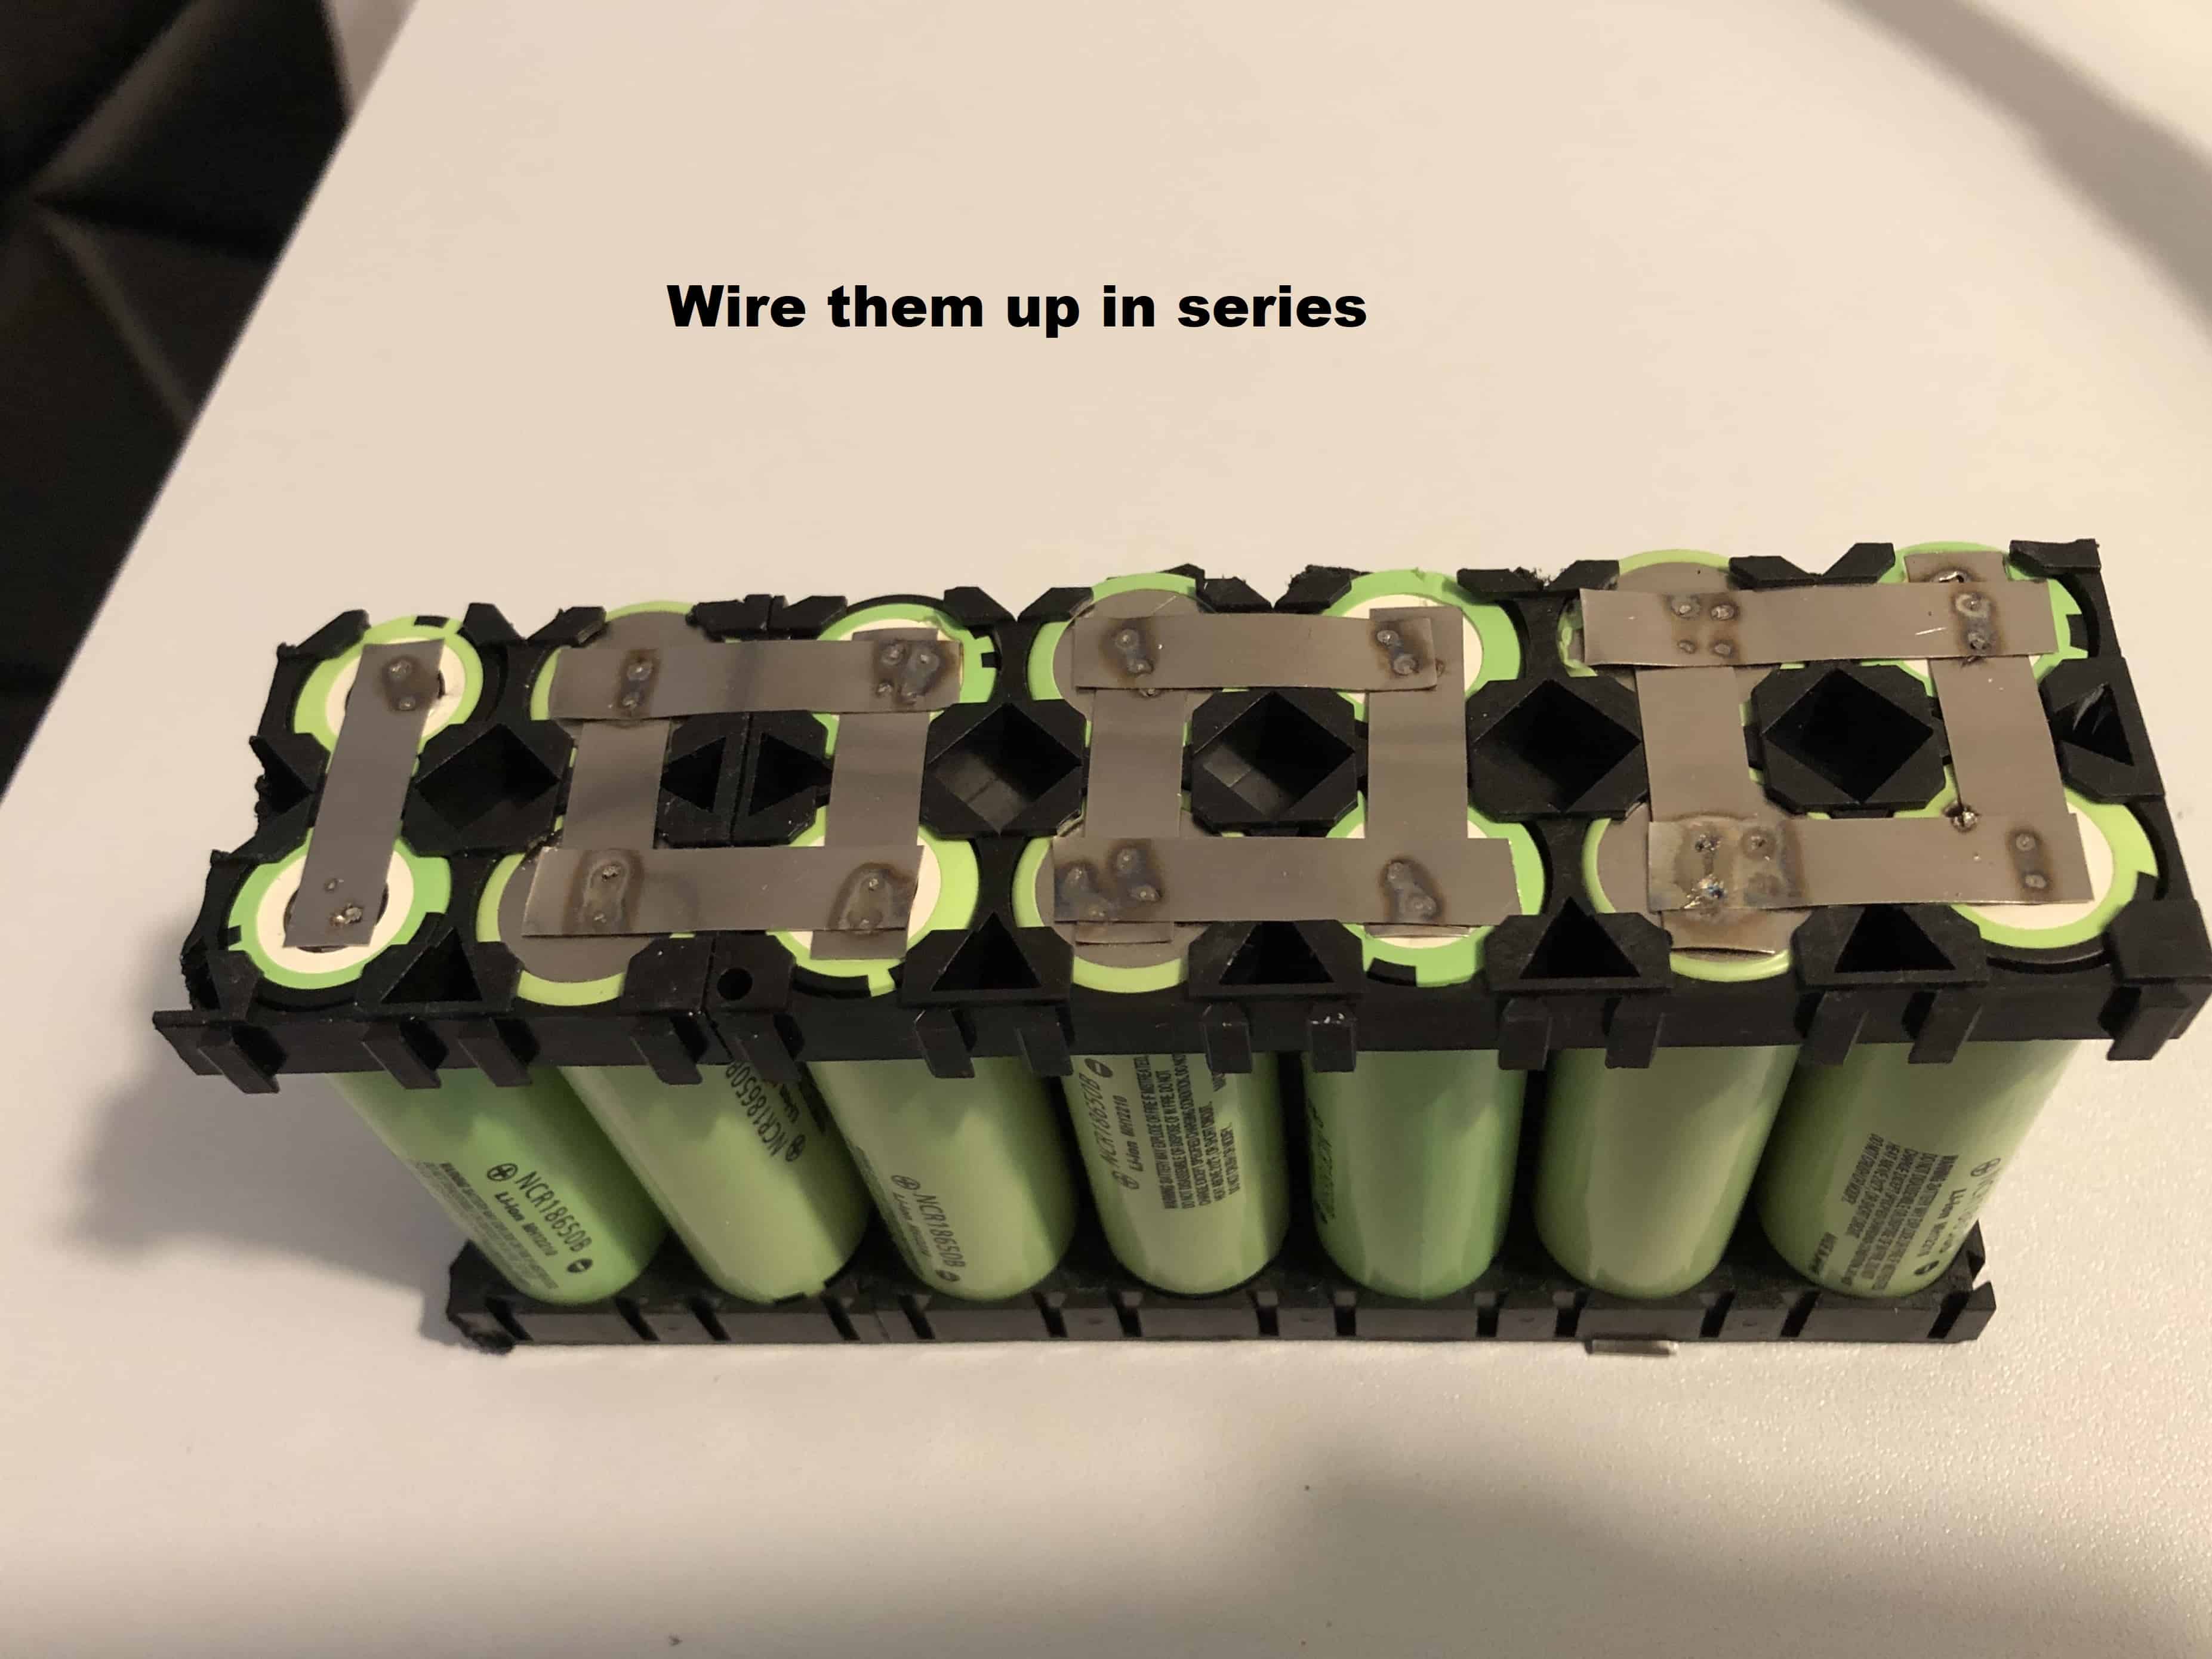
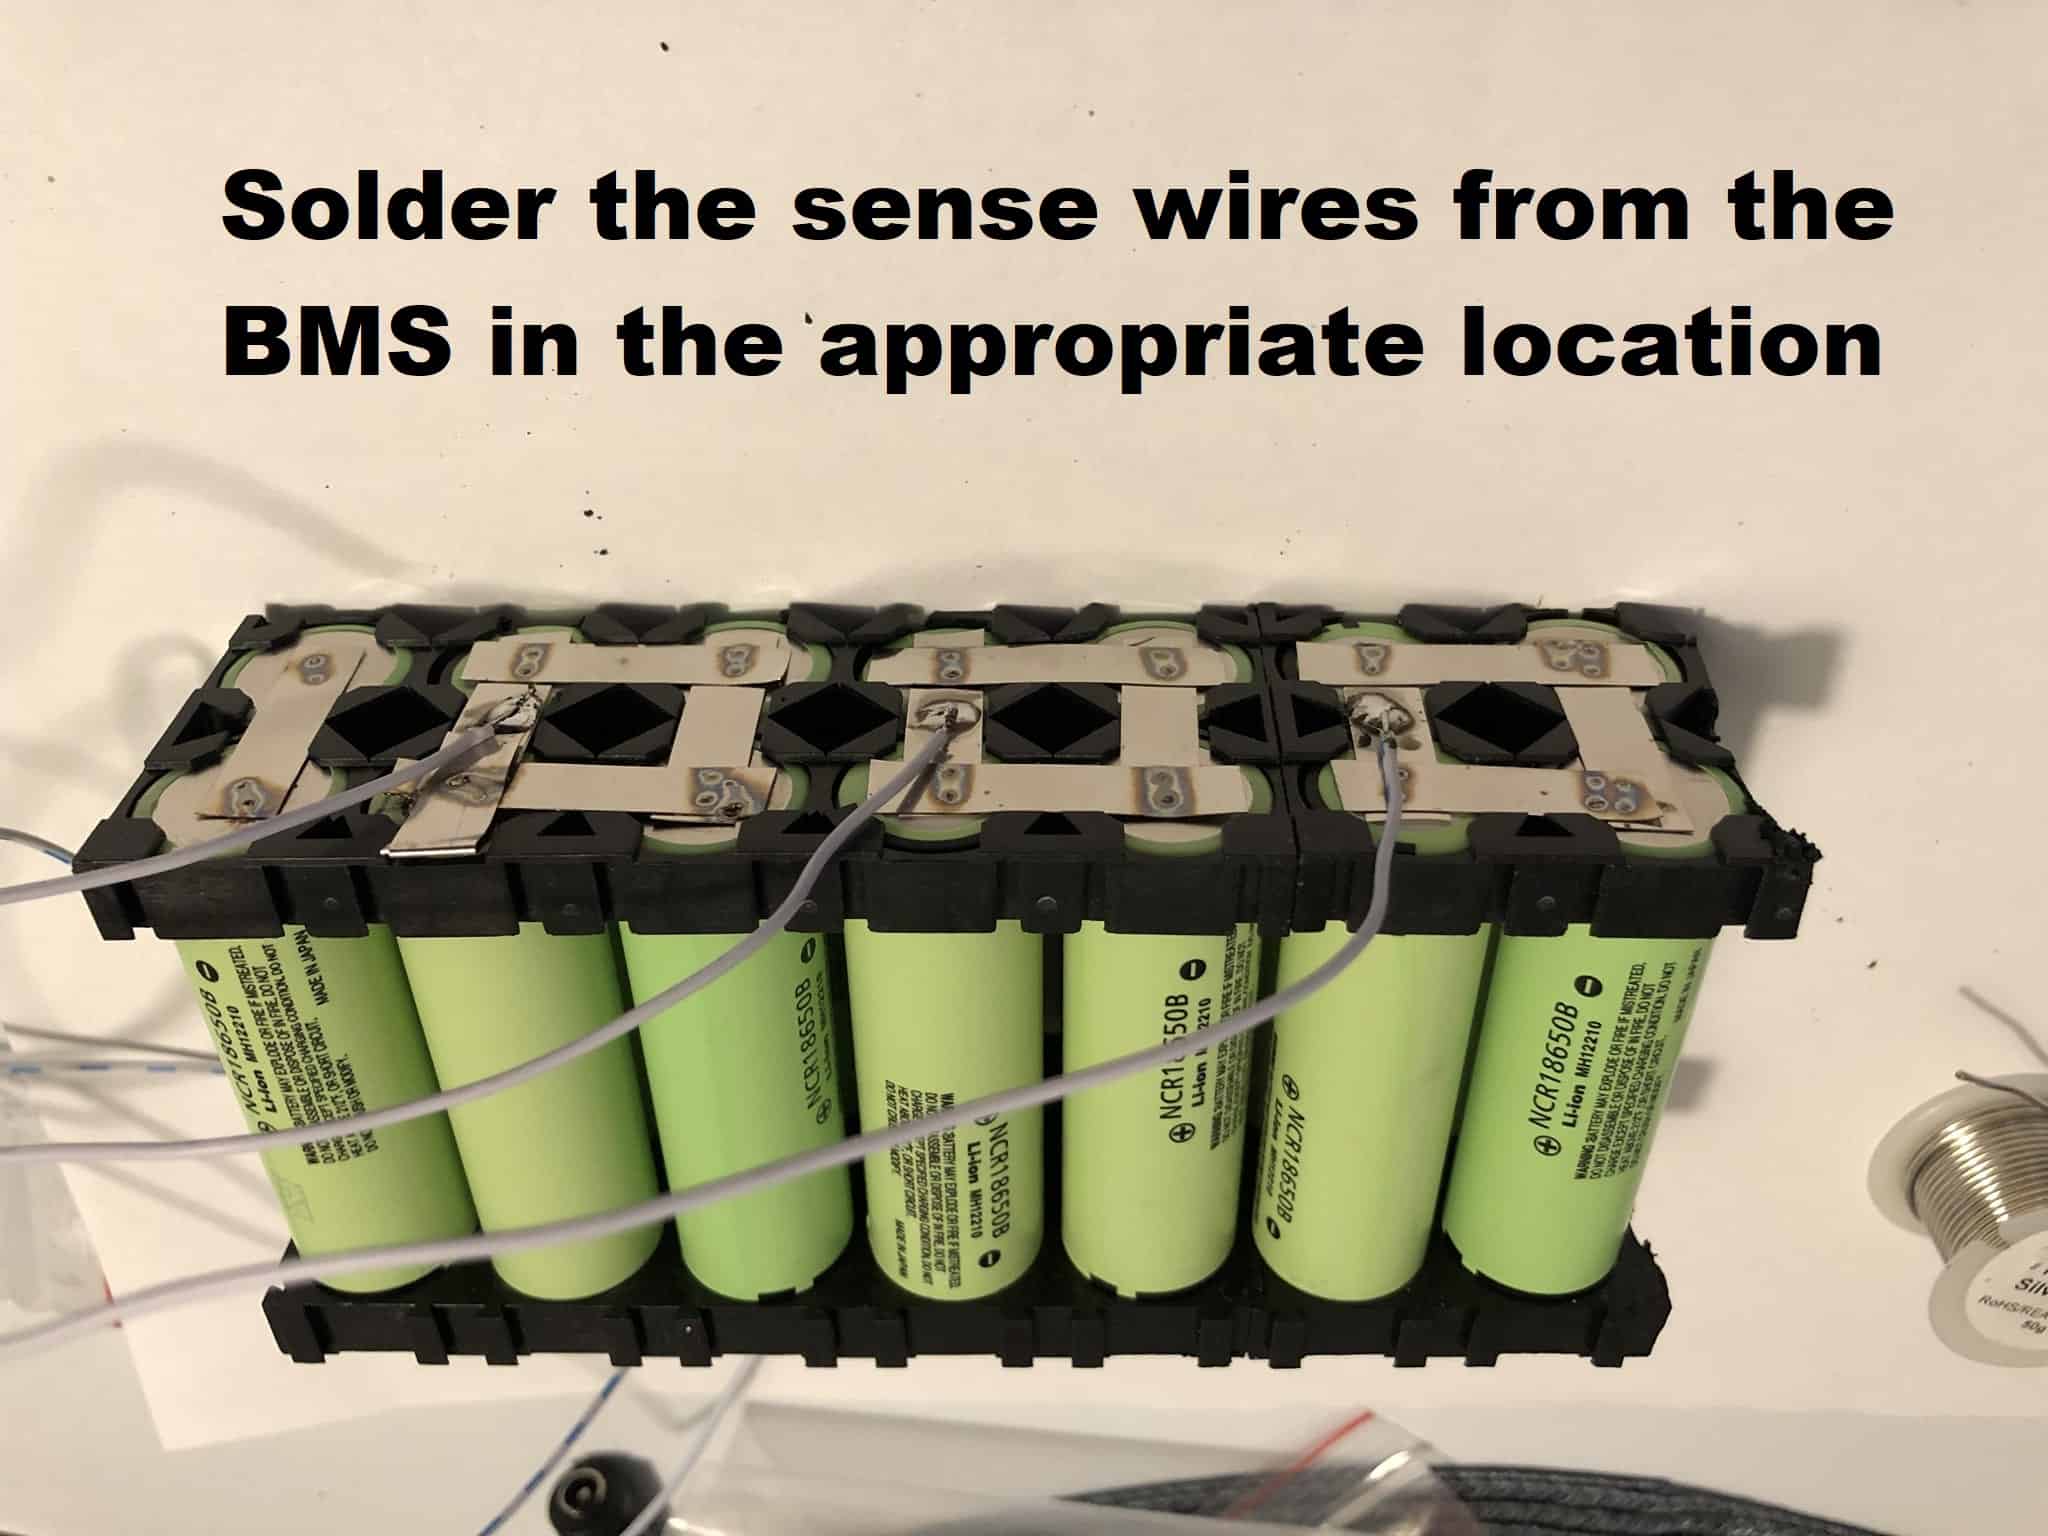
Panasonic cells were my choice for this battery pack, but those are hard to find right now. You can use any 18650 quality cells with good mAh rating. The BMS is a universal one. This means you can connect any battery combination from 3 to 13. In our case : 7. However, you can use a normal 7S BMS as well (which you should probably do anyway). I used this universal one because I had one handy. In this case snip the wires corresponding to batteries 8-13. Please make sure it’s an universal BMS. Usually a 13S BMS works for exactly 13 cells, and no less.
If you still have some questions regarding this side, check out a previous article : another BMS setup. What I want to point out that some BMS’s don’t have “C-” solder point, where you connect the negative side of the charger. If that is the case, solder the charger to the “P-” point.
Connectors
There are few connectors here to make our life easier :
- The 5.5×2.5 mm DC jack male. The purpose of this connector is to give power the the amp. You can also skip this connector and solder 2 wires directly to the board. You can find the solder points right next to the DC socket. However, since the 2 points are really close to one another I prefer to use the plug. Safer and more convenient. If you do want to solder, make sure the wires are not connected to the battery or you will most likely burn something up.
- The 5.5×2.1 mm DC female socket. This is to connect the charger. However, make sure you check your exact charger dimensions. You might need other dimensions.
- The Jack male – RCA male audio cable. You need this to connect the Bluetooth module to the amplifier. Again you can solder directly to the boards, but I find this much too convenient. Make sure the cable is short enough so you don’t clutter the inside of the speaker box (0.3m / 0.5m / 1 ft cables are fine).
Buttons and battery indicator
You can see in the first section of the DIY Bluetooth speaker amplifier diagram, a button in series with the battery indicator. The battery indicator is always on and has a back light. This might be upsetting in the dark. That’s why I placed a switch to turn on the indicator when I wish. If this does not bother you, you can skip the switch.
Furthermore, there are battery indicators with a button on the front panel. That will make the switch redundant. To set up the switch for 29.4V do the following : There is a button on the back. While holding the button down, connect the indicator to power. Now you are in the configuration menu. Press the button until something with the number “7” appears. Then disconnect from power. After you connect to power again (without holding the button), you can use the button to switch from voltage to percent. Percent is much more familiar, so I will leave it at that.
The other switch is much more important. It’s 24V and 5A rated on DC. The 24V seems low, but that will not burn the switch. However, high current will. So you need something with at least 5A rating. Since I wanted these aluminium anti-vandal switches this is the only one I could find. It’s an ON-ON switch.

It has 3 pairs of connectors. Use the ones which are to the exterior. The middle ones leave un-connected. So now it’s basically an ON-OFF switch. The 3rd pair of connectors (to the middle) are for the 12V led (the button is illuminated). But I’m not going to bother converting 29V to 12V just for this led I don’t even want.
The step-down converter and isolator
There are 2 odd components in this schematic. One is step-down converted which converts the 29V from the battery to 5V. This is because the Bluetooth module works with 5V. If you connect it directly to the battery you will have one dead BT module. After this voltage conversion, you can directly connect it to the Bluetooth board. However, by doing so, you will get an annoying hum, because of ground-loop issues. To solve this problem, you use the the 5V/5V converter. And the hum goes away.
The Bluetooth module is a straightforward mini-board. You can power it up using micro-USB connection. However, this time, I chosen to solder directly to the board. micro-USB connections are poor, and you don’t want to find that your Bluetooth module is un-powered after the speaker box is finished.
For the charger make sure you get an exactly 29.4V one with at least 2A (for faster charging).
DIY Bluetooth speaker amplifier
Now that we have cleared everything up, let’s focus on the amplifier. And we shall talk some specs. This amp is rated to be 3 ohm stable and will put out 2 x 100 W at 4 Ohms. Now this sounds all too good on paper, but in reality we know that is not always the case. I connected some beefy resistors to the amplifier and made some measurements.
I used an iPhone to connect to the Bluetooth module and used a 500 Hz sine wave to make the measurements. The volume on the phone (at least on this iOS 12 version) has 16 notches. Conveniently enough, the amplifier has a red LED that shows clipping. Here are the measurements.
Power ratings at 8.2 Ohms :
- 100% volume – 2 x 54 W – severe clipping
- 94% volume – 2 x 35 W – noticeable clipping
- 87% volume – 2 x 20 W – no clipping
- 81% volume – 2 x 11 W – no clipping
Power ratings at 4.1 Ohms :
- 100% volume – 2 x 90 W – severe clipping
- 94% volume – 2 x 66 W – noticeable clipping
- 87% volume – 2 x 37 W – no clipping
- 81% volume – 2 x 21 W – no clipping
What is safe to say, judging by there numbers, is that you can get 2 x 40 W of clean power into 4 Ohm speakers.
Battery life
I made some tests for the battery life as well. For this I used some speakers, but used the resistors as well. Problem is that the resistors don’t mimic reality. In the sense that the battery will drain much faster on a resistor, rather than a true speaker. The resistor has a fixed impedance, while the speaker will have very high impedance at high frequencies, which will draw significantly less current. Anyway, I did measure the play time on some 6 Ohm speaker. Imagine that this is a problem. To play some speakers full blast for half a day. You will get someone annoyed, including yourself. Since all battery life testings are made at 80%, that is what I did also. And played some random long house mix on youtube, with good audio quality.
Measured battery life :
- 4.1 Ohm resistor – 6:10 hours of play time
- 6 Ohm speakers – 11:20 hours of play time
- 8.2 Ohm resistor – 10:20 hours of play time
You can clearly see that an 8 Ohm resistor has a worst battery life than a 6 Ohm speaker. This will not be the case with an actual 8 Ohm speaker.
Battery life through speakers :
- Estimated 4 Ohm speakers – 8:30 hours of play time
- Measured 6 Ohm speakers – 11:20 hours of play time
- Estimated 8 Ohm speakers – 14:10 hours of play time
What is also an important metric is the charging time. This will vary depending on your charger. Using a 2A charger I managed to get the battery from flat to full in approx 3 hours.
Conclusion
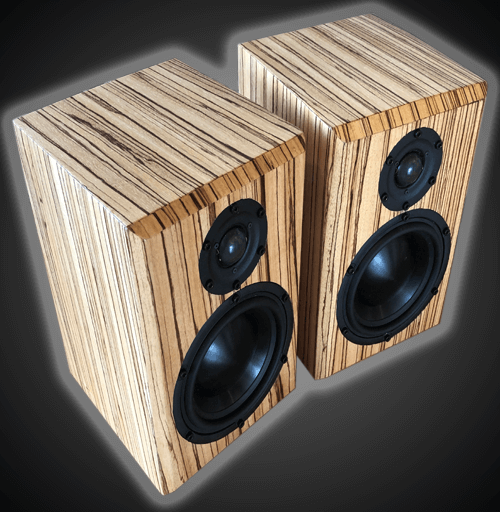
When you are making a DIY Bluetooth speaker amplifier you have to know how to read between the lines, or to take the numbers in the specification sheet with a grain of salt. Since I made all the measurements beforehand, you know something for a fact. This amp will deliver 2 x 40 W watts of clean power into 4 Ohm speakers, and it will play for 8 hours straight. Now you can choose your speakers and enclosure however you want.


Learn loudspeaker design from scratch

16 comments
Good day Audio judgment,
I have been doing research on how to build my own DIY powerful bluetooth speaker like this in the diagram before coming across your detailed explanation and well detail drawing of this DIY BS.
Pls I want to build a DIY Bluetooth speaker with 2 X 50w 8ohm speaker with the use of 18650 battery combination that could play for 12hr max. please could you help with diagrams and part to purchase to achieve this project am in Nigeria in West Africa.
Note: Any advice or modification to the specification above will be appreciated.
Thank you in anticipation.
Tomori
Well the amp is rated at 50W @ 8 Ohm so you might as well just copy the project as it is and use your own combination of speakers. You can find a link in the article where I describe the amplification side in more detail.
Hi, great article and build! I have a question;
I’m building exactly this, but, I want the option to either play it portable, or, all the time on mains….so does it work like that? Ie I can either plug it in and play (at same time charge the battery), or can have fully portable?
Yes, if you plug it in, it will charge the battery and draw power from the wall, so it will play indefinitely.
Thanks for reply. Thats great, hope you don’t mind if I borrow your design, but I see components are no longer available? Also, if I wanted an amp to control bass/treble could you recommend one?
Also, if you could help me out, if i bought a battery pack already made,..how would the wiring be for that? Still need Universial 3S?
If you buy a battery pack already made then you should skip the BMS part and you should have connectors for the charger and for the consumer (amplifier in this case).
Ok thanks! Could you send me an email
To peeet03@hotmail.com and help me with adding in bass treble controls ?
well, you have to get an amplifier with treble and bass controls. That’s it.
Still on the battery pack. Did u solder the two sides of the battery, ( I.e – and + sides? ) or can you show the pictures my clearer.
You have to use a spot welder and nickel strips, not a soldering iron.
Nice …
To make a portable speaker you need to understand the process of it however you can buy portable speaker from a famous audio store in Vancouver as to buy it you need a wise mind during selection of speakers.
For sound and volume isn’t the sensitivity or db rating determine how loud it plays? SNR
Yes, how efficient the driver is plus how much power does it receive.
Hi great article, very informative. My question,with a class d 2.1 amplifier, I want to use 2×30w 8ohms and a subwoofer of 165w at 3ohms but the amplifier recommend 95w at 3ohm,will there be noticeable clipping?
clipping will be present as long as you crank up the volume too much. Otherwise it will be fine.