
How to tune a passive radiator – using WinISD
Design a passive radiator enclosure
Let’s find out how to tune a passive radiator. First of all, you should know all the basic stuff about passive radiators. How they are similar with bass reflex design, and so on. More info in this article. In the previous mentioned article, we talked about the principles behind the PR design, but also about different alignments, when the active driver is identical with the passive driver (without the motor, of course).
While in this article we will use matched speakers (active and passive driver), we are not going to use alignments. Instead, we shall make use of software, like WinISD.
Enclosure example
To serve as an example for our passive radiator enclosure design, I devised a small box, for a portable speaker. Don’t focus too much on it, it’s just a test enclosure, only one channel (that’s why there is only one tweeter).
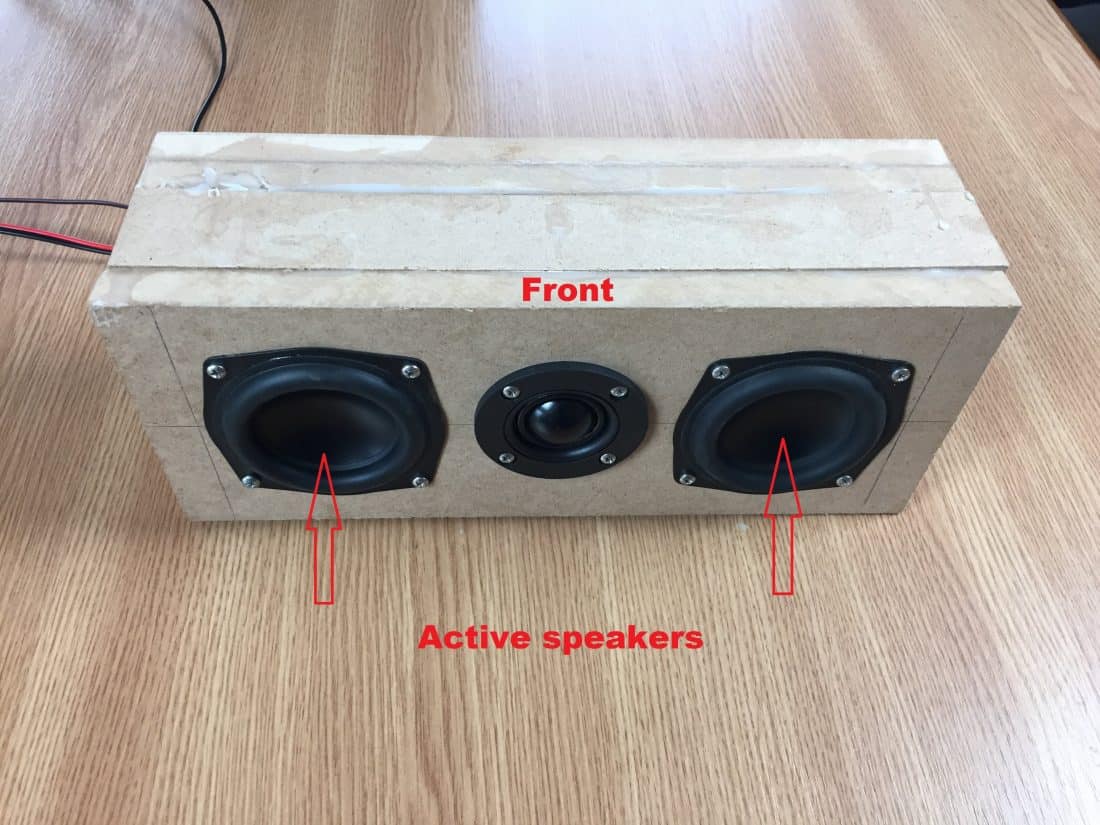
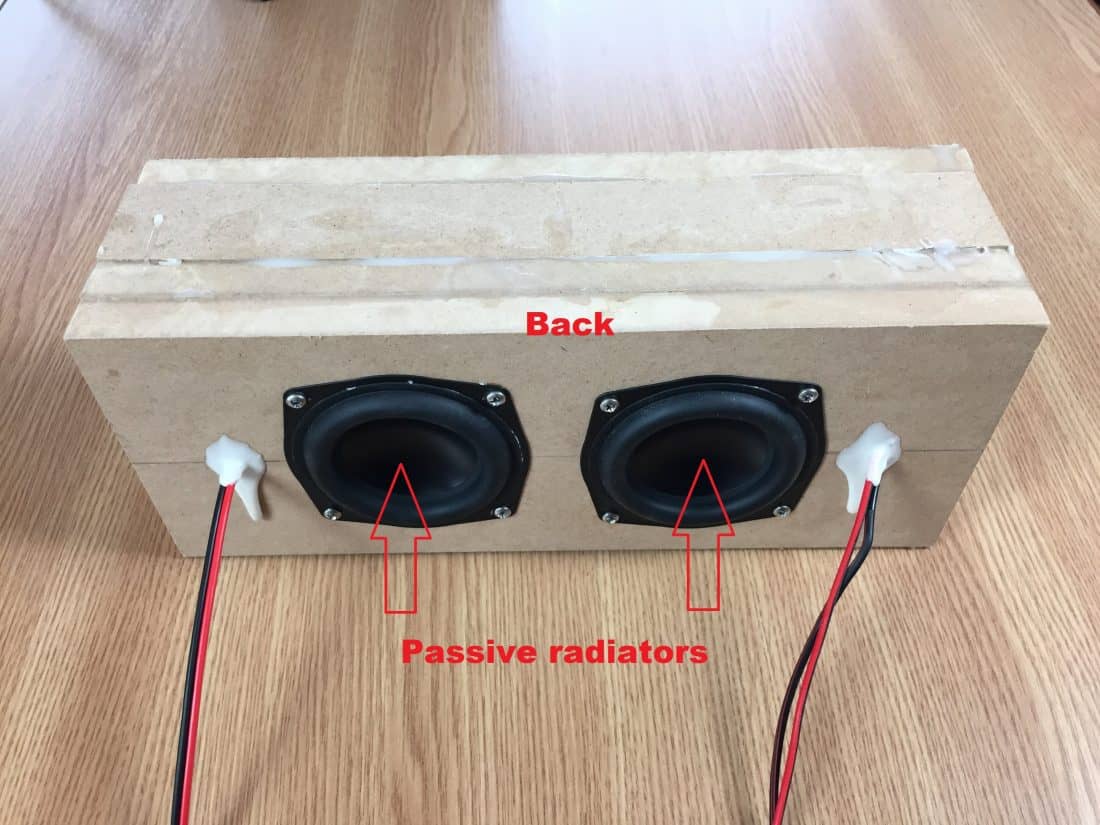
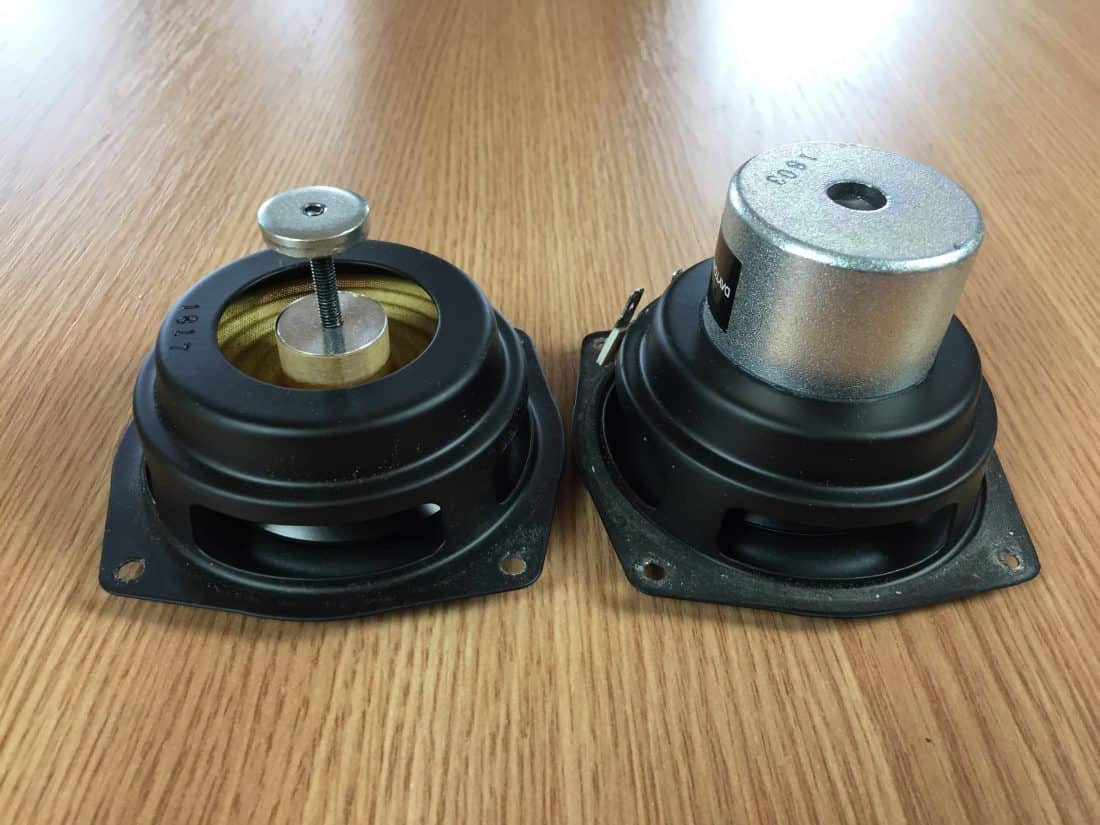
Regardless off that, let’s focus on how to design the enclosure. After that, let’s switch our attention on how to tune a passive radiator. The drivers under test :
- Dayton Audio ND91-4 – active driver – [Sound Imports] [Amazon] [Parts Express] (affiliate paid links)
- Dayton Audio ND90-PR – passive radiator -[Sound Imports] [Amazon] [Parts Express] (affiliate paid links)
They are both 3.5″ drivers. And for the purposes of this test, the tweeter is not connected to anything. We are focusing on the drivers which matter to our project. In this case, since I’m trying to make a portable speaker, passive radiator is a great choice. Since the enclosure is so small, the port length would be too much to place inside the enclosure. As a result, the passive radiator solves this issue.
To help us in our enclosure design we are going to use WinISD.
Enclosure design using WinISD
Let’s go right in WinISD. First thing you want to do is click “Create new project” and select “Add New”. Never use anything from existing list. You cannot trust that those parameters are accurate. Sometimes the list contains the driver you want, but it might be old versions of the same driver. As a result, always manually input your speaker parameters. After you entered the name and model, go to “Parameters” tab.
How to design loudspeakers - video courses


In this section, make sure you check “Auto calculate unknowns” and don’t enter every parameter. Let it calculate the rest automatically. Otherwise, when you load this driver, you will get a parameter inconsistency error. So, for example, if you enter Qes and Qms, let it calculate Qts. Enter values and use “Tab” to switch between parameters. It will calculate automatically where it can. I entered only these parameters :
- Qes
- Qms
- Fs
- Vas
- Mms
- Le
- Xmax
The parameter list looked like this :

After you save the driver, you want to “Create a new project”. Select your newly created driver and click “Next”. We have 2 drivers into a normal configuration. After that, select “Passive Radiator”. Now we have to enter the parameters of the passive radiator. Don’t worry that we have 2 radiators, we will change that when we design the enclosure. You find these parameters in the spec sheet provided by the manufacturer. Pay close attention to the units :
- Vas = 1.5 liters = 0.0015 m³
- Qms = 6.15
- Fs = 53.8 Hz
- Sd = 31.2 cm² = 0.00312 m²
- Xmax = 9 mm = 0.009 m

Then you simply select no alignment, give the project a name and create the new project.
Enclosure tuning frequency
When it comes to tuning the resonant frequency of the box we have few options :
- Alter the volume of the box. Increasing the volume lowers the resonant frequency.
- Changing the moving mass of the passive radiator. We will see how to tune a passive radiator in the next section. Adding mass lowers the resonant frequency.
- Adding extra passive radiators. If you want to add mass to the cone, it’s easy. However, what if you want to subtract and there is nothing to subtract? You simply add another passive radiator. For each extra passive radiator the tuning frequency goes up.
Before we start doing anything, let’s change some numbers that are clearly wrong. The default enclosure volume is set to 50 liters. Since we are designing a small portable speaker, let’s dial that down to 1.5 liters.
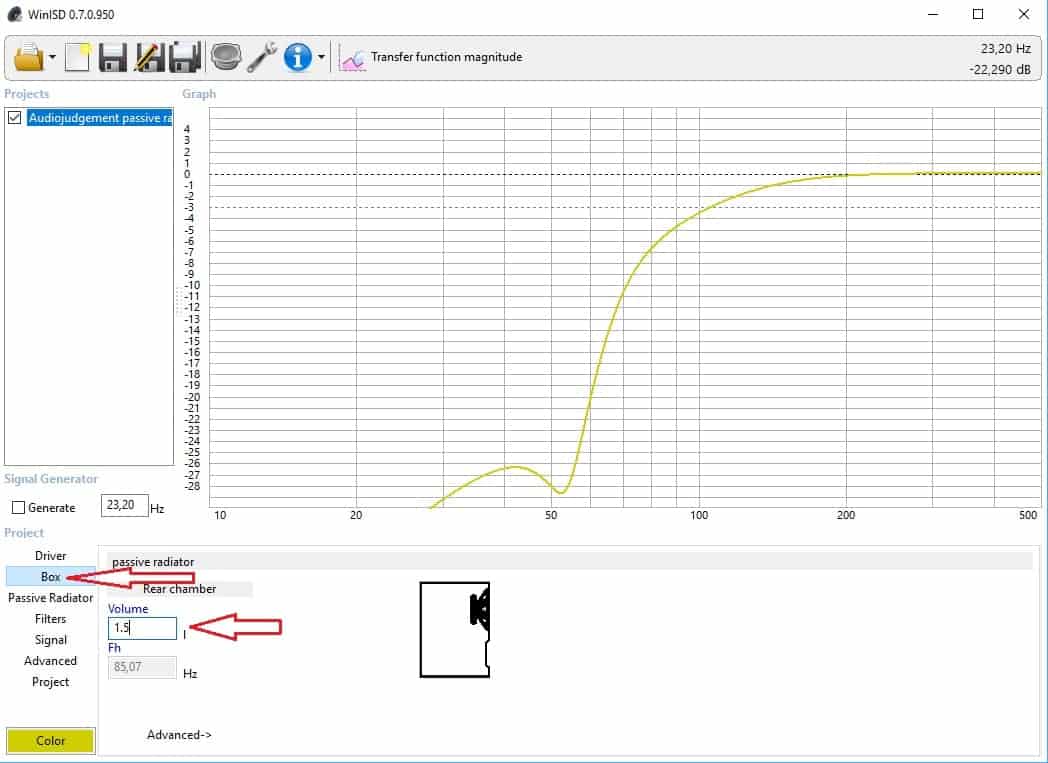
As you can see, now we got a curve that looks much more appropriate. Next we got to change the number of passive radiators. The default value is set to 1, however, we have 2 pieces.
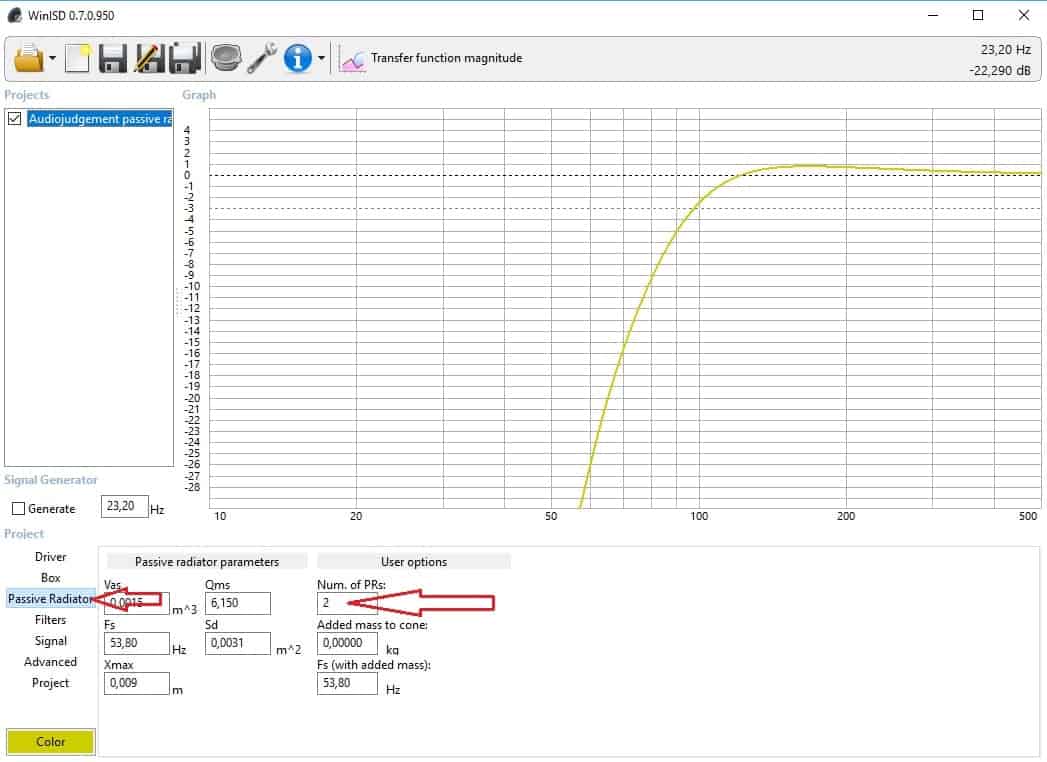
If you go back to the box section, you can see that our resonant frequency has gone up. By both actions : reducing the volume and adding and extra passive radiator. The resonant frequency of the box went from 54.6 Hz to 93.18 Hz. This is a good thing. Since we have small drivers that have little output at low frequencies, it’s not a good idea to tune the box too low. The passive radiators cannot produce low frequencies if they are not present to begin with. In this particular case, aiming for an even high tuning frequency would be best (120 – 140 Hz).
How to tune a passive radiator
Our little text box measures at 1.42 liters, so let’s change that in WinISD.

Since we reduced the volume, the resonant frequency has gone up to 95.38 Hz. This case is with no weight added on both passive radiators. Let’s do a quick impedance sweep to validate our results.
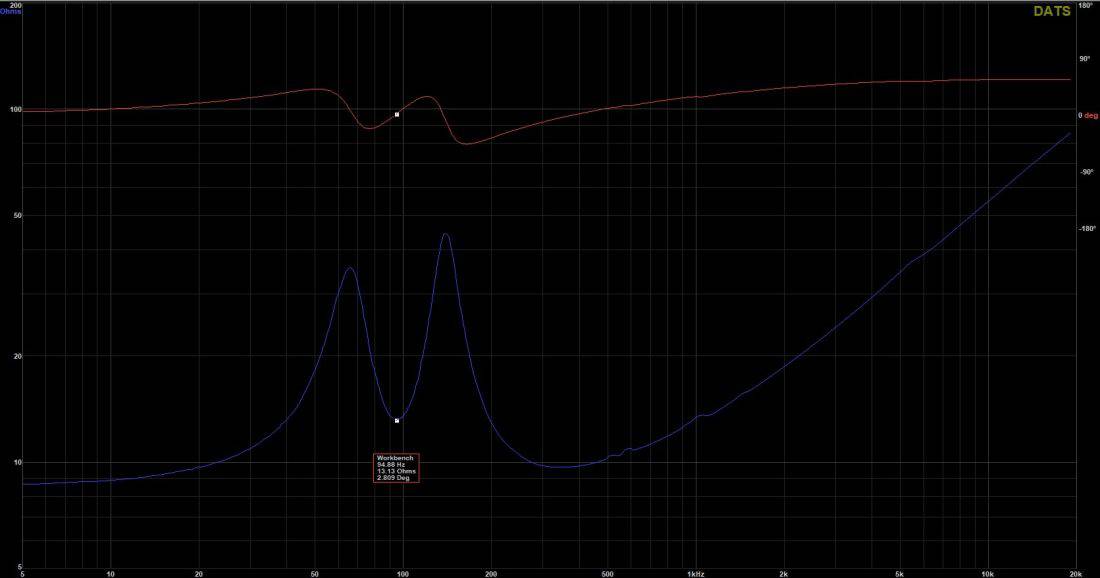
The tuning frequency of the box is given by the lowest point between the peaks. So, 94.88 Hz. Quite surprised that the accuracy is so good on modeling software. Now let’s see what happens when we add mass to the passive radiators. In our case, we don’t really want to decrease the tuning frequency, but we are doing this just for the sake of having an example. In a subwoofer setup, you will probably want to reduce the resonant frequency.
Now let’s add some weight to the passive radiator, to decrease the resonant frequency of the box.
I’m going to add one disc (2 are available) plus the nut which you can tighten with your hand. In the picture above you can the the PR with just one disc, which is not screwed in all the way. If I bring up the scale :

We can see that they add up to 10.7 grams. Let’s input this into WinISD :

And now let’s check the resonant frequency of the box.
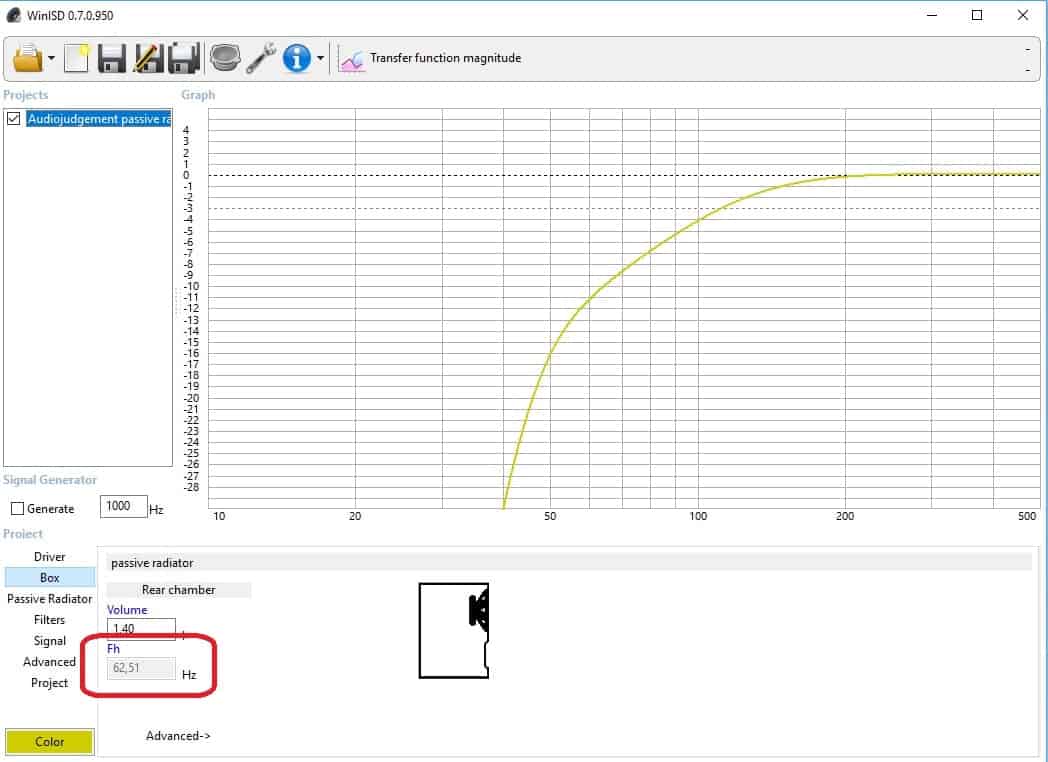
It has gone down to 62.51 Hz. For our small speaker, you never want to do this. It is tuned too low. We only want to check the effects. Let’s take a look at the impedance plot.

The measurement indicates 62.58 Hz. Impressive accuracy of this WinISD application.
Increasing the tuning frequency
Like I said before, if you get rid of all the weights, you cannot increase the resonant frequency. You can if you use more passive radiators. However, there are other creative ways on how to tune a passive radiator.
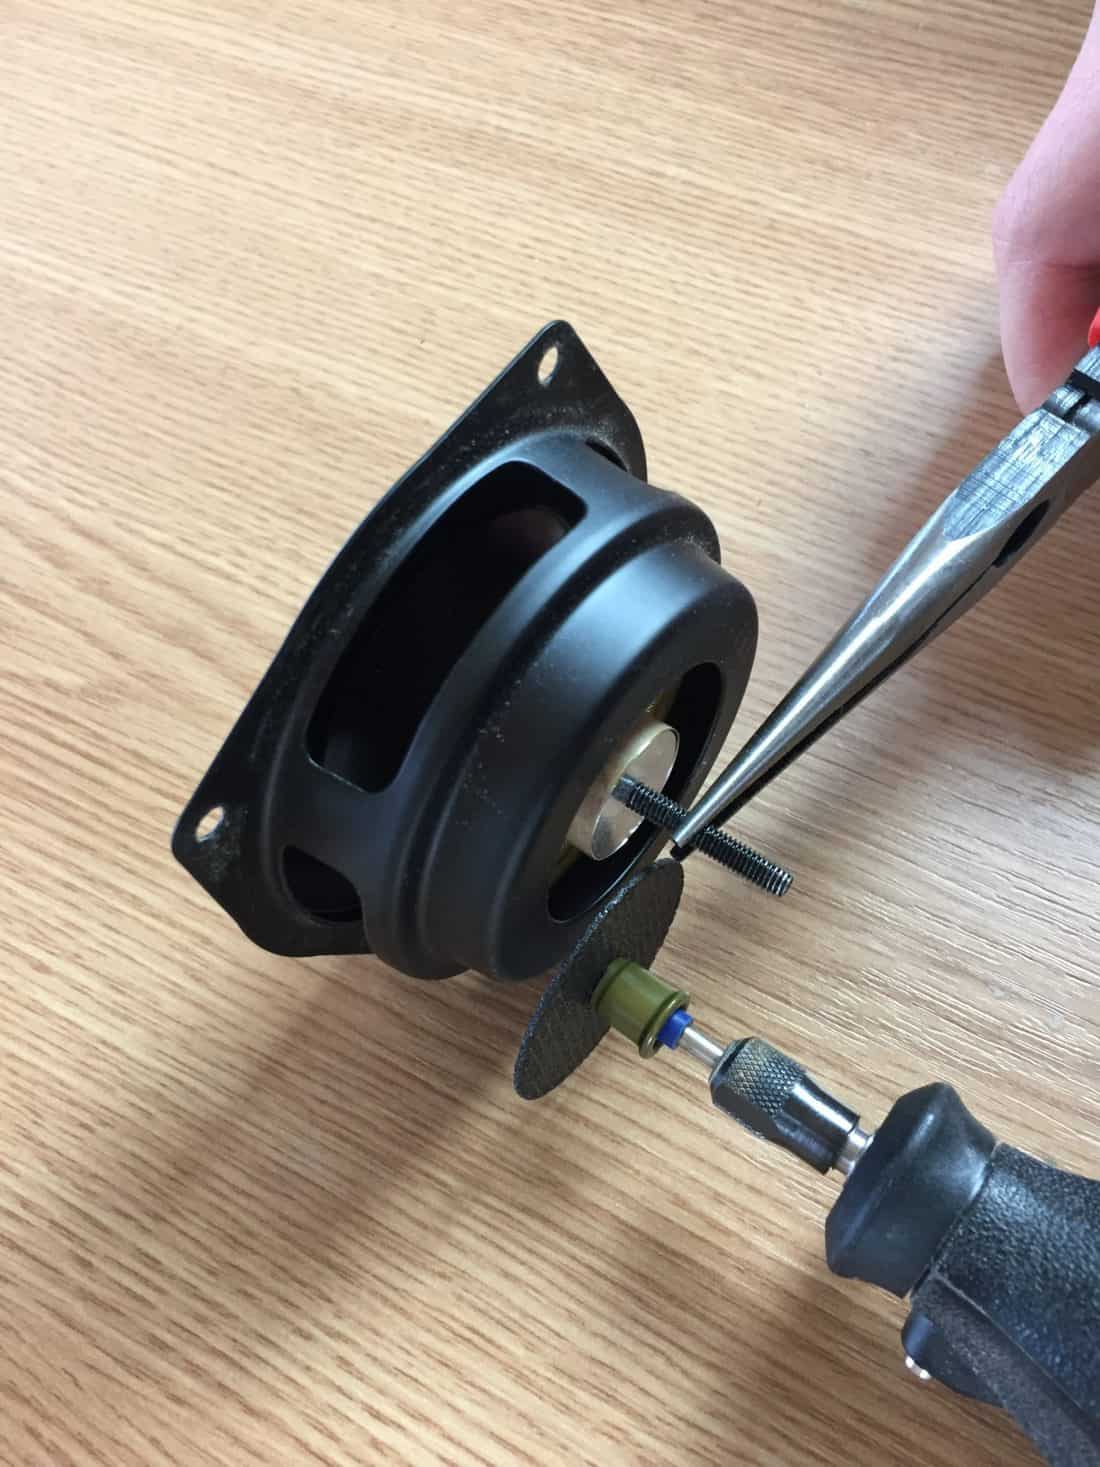
I used a Dremel to cut off the threaded rod.

By doing this we will lose an additional 1.1 grams from the moving mass, so the resonant frequency will go up by a bit.

Here is how the passive radiator looks without the rod. By doing this, I eliminated some clearance issues also, because I had to make the enclosure deeper than it had to be. Otherwise, the passive radiator rod might hit the active drivers in the front.
Conclusion
Now we know how to tune a passive radiator. Adding weight is simpler compared to losing weight, but you can also add more radiators. However, Dayton Audio has a neat implementation to add weight. With some manufacturers you might not be so lucky. You will have to find some creative solutions on how to stick something to the cone, to increase it’s weight and reduce the resonant frequency.

Learn loudspeaker design from scratch

5 comments
Hi, in
“It has gone down to 62.51 Hz. For our small speaker, you never want to do this. It is tuned too low. We only want to check the effects. Let’s take a look at the impedance plot.”
Why do you say “you never want to do this”, if the FS of speaker is 53,8?
Hello
The Fs of the active speaker is actually 74 Hz and if you are tuning the box too low, the passive radiators wont contribute that much and the whole system and will act similar to a sealed box (because the passive radiators are not fully excited by the active speakers). Don’t get me wrong, if you tune the box at 62 Hz, you will get a very slight boost at that frequency. But I think it’s better to understand the limitations of the speaker and tune the box higher and get a decent output at higher frequencies then try to hit low notes with small speakers.
Wonderful artical. Been searching for this exact thing
I have a pair of small Teac 2 ways, using a 3.5-4 fullrang and a 1/2 tweeter.
They have a port im not convinved is tuned to anything useful. If i get all other things correct, 2 PR with Fs of 50-70hz will get me in the 100-140ish ballpark?
Sorry, another question.
When calculating the Vd,
With the simple ” passive radiator should be 2xVd of driver”
When using 2 PR for 1 speaker, do we sum the Vd?
In this example: ~3.5″ driver with 60units of Vd, and 2x 2.5″ PR with 60 units of Vd ea? Is that double Vd lol?
Hi
I wrote to you several times.
No answer!
Regards
Trifonovaudio
https://kimmosaunisto.net/Software/VituixCAD/VituixCAD_help_20.html#Appendices