How to build a sealed subwoofer box – Practical example
Why choose a sealed box?
In terms of difficulty, learning how to build a sealed subwoofer box, is the easiest. Sealed enclosures have many advantages. If you are an audiophile and don’t particularly care for loud volumes, you will appreciate the linearity and the low end extension of a closed box. The transient response of sealed enclosures are considered to be the best, if made correctly. Also, compared to other types of enclosures, it requires less volume, so no bulky boxes. It takes the least amount of effort to design and build a sealed subwoofer box, and the tolerance for error is high. So, if you got some minor design / build errors, it won’t affect the sound that much. On the negative side, it does have reduced efficiency and power handling.
Choosing your speaker
Before we learn how to build a sealed subwoofer box, we need to choose our speaker wisely. When choosing your speaker, you should have a look at the fs and Qes values. The resonant frequency should be as low as possible, and the electrical Q should be as high as possible. Actually, the ratio between these 2 values is what you are looking for, and it’s called the Efficiency Bandwidth Product (EBP)
- EBP = Fs / Qes
- If EBP is around 50 or less, then the woofer is suited for sealed.
- If EBP > 100 then the woofer will perform better in a bass reflex.
- If EBP is between 50 and 100, then it’s good for either closed or bass reflex enclosures.
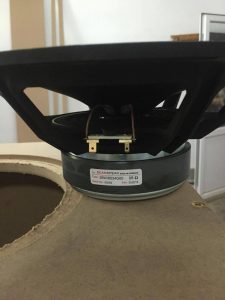
The woofer chosen for our project is the Scanspeak 26w/8534g00 and you can find all the specs of the driver here : 26w-8534g00.
For our particular driver fs = 23 Hz and Qes = 0.42. This means that the EBP = 23 / 0.42 = 54.7. In conclusion, it’s a good candidate for our acoustic suspension enclosure.
Designing a sealed box
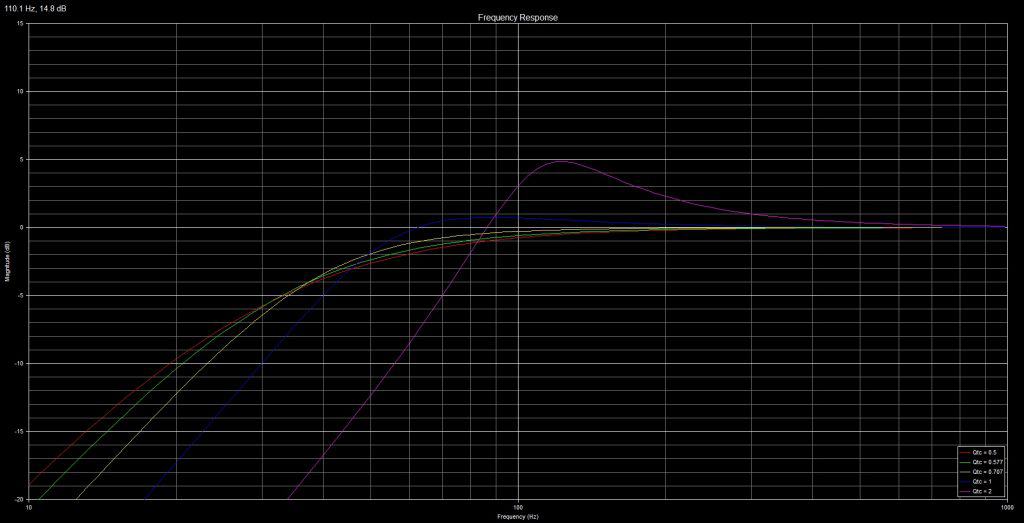
Designing a closed enclosure doesn’t require a lot of effort. The only thing you need to calculate is the net volume of the enclosure, which doesn’t include the volume displaced by the driver, bracing, etc. Get to know what kind of response you want from your subwoofer, and then you calculate the volume. To establish the frequency response you want, you will need to calculate the Qtc of the box. Depending on the value of Qtc, the woofer-enclosure system will exhibit a different response.
- Qtc = 0.5 : Perfect transients, but low efficiency (over damped).
- Qtc = 0.707 : This is the number most people try to reach for, as it gives good transients and flat response with minimum cutoff.
- 0.7 < Qtc < 1.2 : Better efficiency, somewhat degraded transients, steeper roll off.
- Qtc > 1.2 : High efficiency, bad transients, bad frequency response (under damped).
Qtc values also correspond with names :
- Linkwitz-Riley – Qtc = 0.5
- Bessel – Qtc = 0.577
- Butterworth – Qtc = 0.707
- Chebyshev – Qtc > 1
To calculate Qtc, the volume of the box (Vc), and resonant frequency of the box (fc), use these formulas :
- Qtc = Qts * (Vas / Vc + 1)1/2
- Vc = Vas / [(Qtc / Qts)2 -1]
- fc = fs * (Vas / Vc +1)1/2
The design for our speaker
After I made a complete break-in of the speaker, I measured the Thiele / Small parameters and they were a bit off, compared to the quoted values on the spreadsheet. We are going to use the measured values which are :
- fs = 24.9 Hz
- Qts = 0.45
- Vas = 139 l
For these parameters, we are going to model the response curve of each value of Qtc and see how they compare. I already decided that I am going with a Butterworth response, but it’s nice to see how different values of Qtc stack up, for our particular speaker.
Since we chose the Qtc of 0.707, we are going for a maximally flat Butterworth response. Having this information, we can start to answer the question: how to build a sealed subwoofer box? We can use the above formulas to calculate the volume of the box, and the resonant frequency of the box.
- Vc = 139 / [(0.707 / 0.45)2 -1] = 94.66 L
- fc = 24.9 * (139 / 94.66 +1)1/2 = 39.12 Hz
How to build a sealed subwoofer box
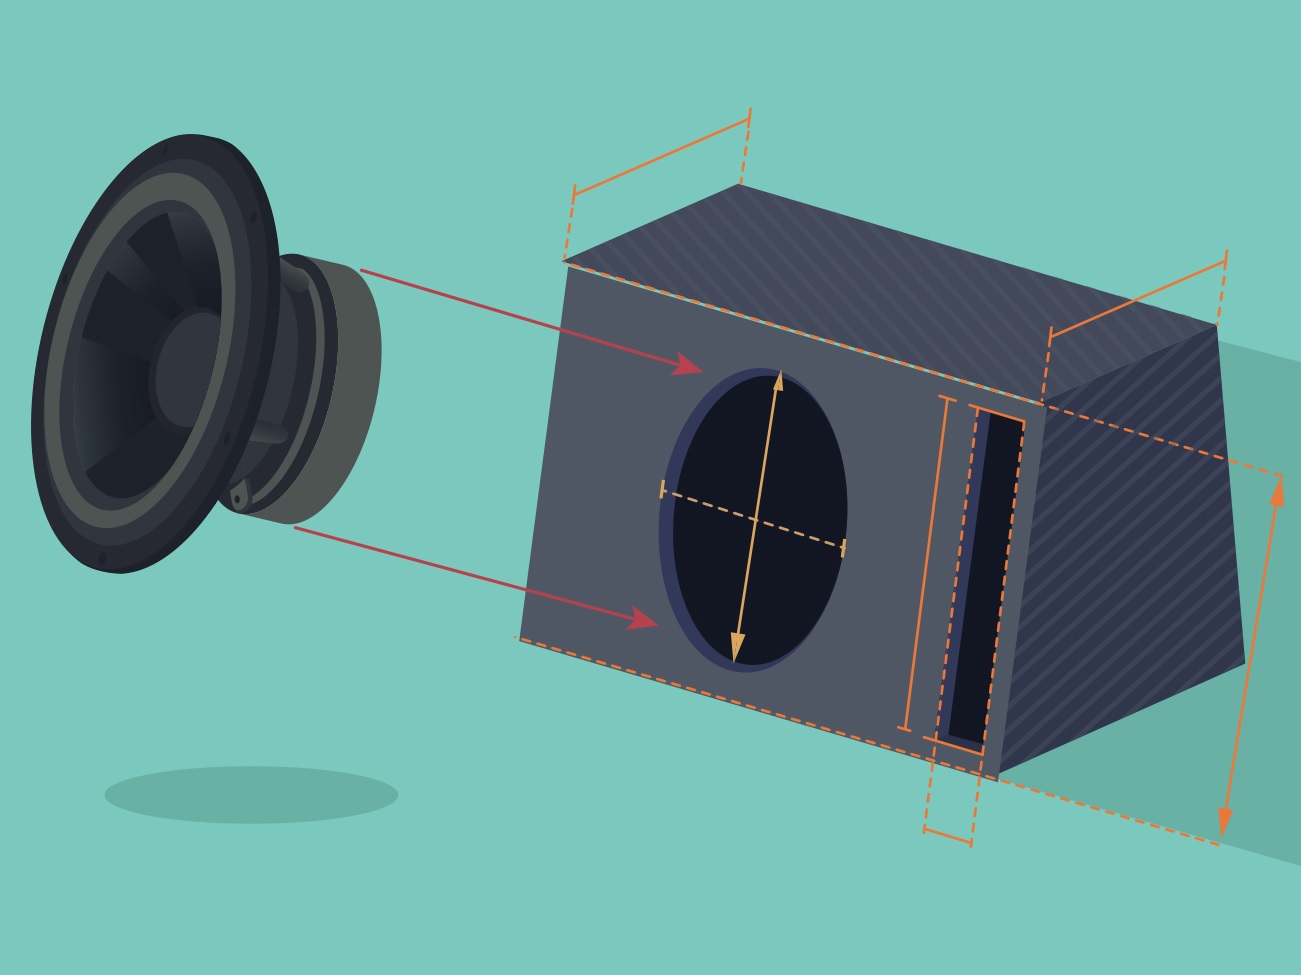
Here are some tips on how to build a sealed subwoofer box. If space permits, I always recommend using a golden ratio for the dimensions of the box. I’m using the one suggested by Ben Kok, which is 1 : 1.12 : 1.41. Using that ratio, I managed the following external dimensions (using 18 mm thick MDF) : 592 x 420 x 470 mm which translates into 92.67 liters of internal volume.
How to design loudspeakers - video courses
Now we have to add the volume dislocated by the magnet structure of the driver, but I’m not going to do that. I got a lower volume than 94.66 liters, and taking the magnet assembly into consideration the volume is even lower. However, that is not going to matter, because the box will be stuffed with sound damping material which will effectively increase the volume of the box, by altering the sound velocity inside the box. And, as always, it ain’t that serious when it comes to sealed enclosures, few liters extra or missing.
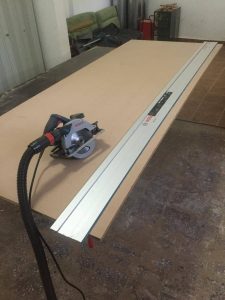
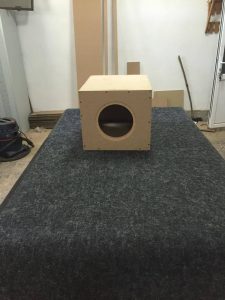
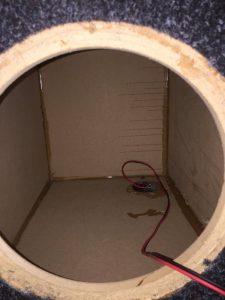
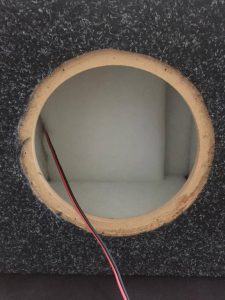
Here are some pictures with the build :
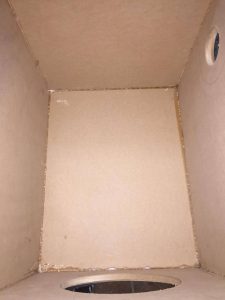
Apply sufficient silicone sealant on every joint. You can see this in the picture with the inside of the box. This is very important for a closed enclosure, to be as air tight as possible. The woofer is of a measly 80 W of power, so I didn’t consider any bracing.
Stuffing
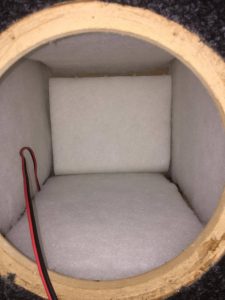
If you want to know how to build a sealed subwoofer box the proper way, you know that after you finished assembling the box, you are not done yet. As with all the sealed enclosures, using sound damping material on the inside of the box is always a good thing. Sometimes only the walls are lined with such material, but most of the times the whole box is stuffed. I used Visaton loudspeaker wool (Amazon affiliate paid link) for the walls first, and then I continued to fill the box, till the wool got close to the magnet of the speaker.
Before I started to fill the box with sound damping material, I used a large amount of silicone on the terminal plug so I don’t have any air leaks.
Measurement
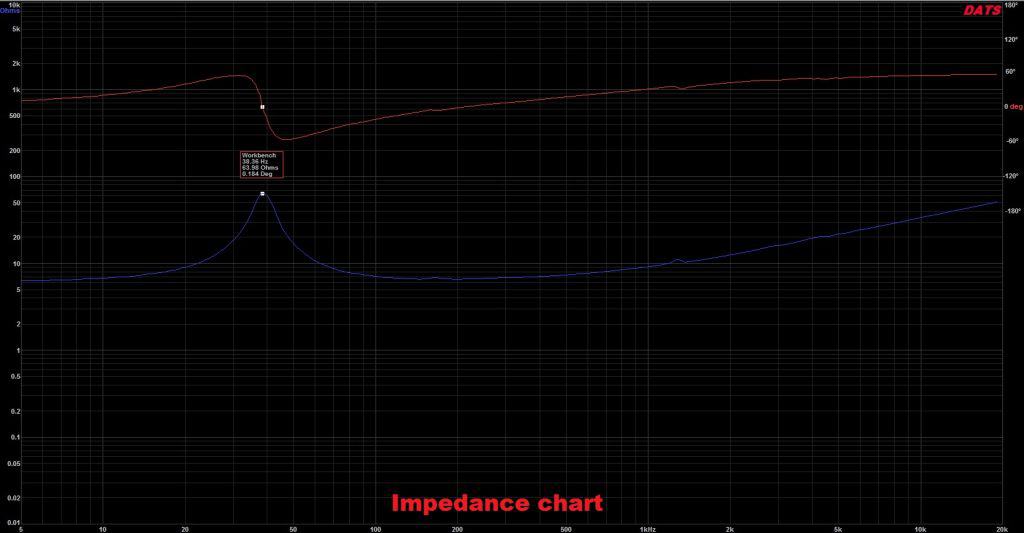
Let’s start with the impedance chart of the enclosure :
From the impedance chart, we can tell the resonant frequency of the system, which is at the impedance peak. The resonant frequency is 38.36 Hz. Very close to the 39.12 Hz we previously calculated. The difference comes from the stuffing inside the box. It is pretty unpredictable, but you can correct it afterwards. You can always remove some of it, if you so desire.
How much volume did we gain by stuffing the box?
By knowing the resonant frequency, we can now calculate the effective volume of the box. Just out of curiosity, to see how much volume did we gained by using damping material.
The internal volume of the box was 92.67 liters and the volume displaced by the speaker is not given in the spec sheet, but I’m guessing a little above 1 liter. So, let’s say the enclosure has a net volume of 91.5 liters.
Using the formulas from the beginning of the article, we can replace the new resonant frequency of the box (fc) and the rest of values remain the same(Vas and fs), except the volume of the box (Vc) which we are trying to find out. Using the new values Vc = 101.21 liters. So, by stuffing the box we gained an additional 10 liters of effective volume.
Frequency response and Qtc
Using the new volume we can calculate the new Qtc, because it has slightly changed. As a result, if you do the math, the new Qtc = 0.69. Which is not much of a difference from the 0.7 we were aiming for. That’s the beauty of sealed enclosures, you can make slight errors and still be on track.
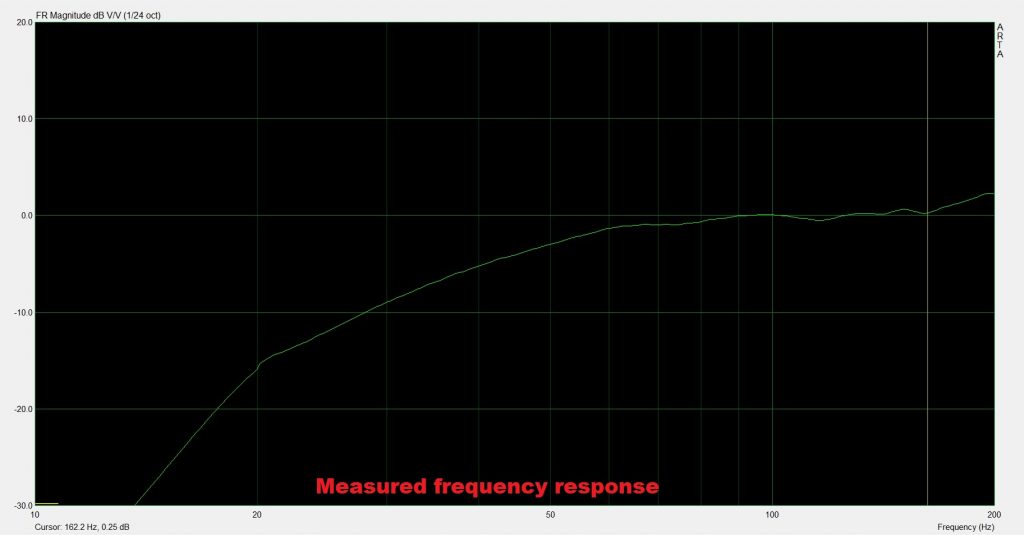
Let’s take a look at the frequency response :
The graph displays till 200 Hz, because it’s a subwoofer and the higher frequencies are of no interest. It is amazing how the modeled frequency response resembles so much the measured frequency response. It plays linear down to 100 Hz and then it starts to very slowly roll-off. We wanted a subwoofer with a linear frequency response and a large response bandwidth.
Conclusion
I’m sure you found a lot of tips and tricks on how to build a sealed subwoofer box. The stuffing not only increases the effective volume of the box, but has other useful functions, like : absorbing back waves, minimizing standing waves etc. The gain in perceived volume was about 10%, but the impact on Qtc was minimal. That’s why I always encourage an amateur DIY-er to start with a sealed enclosure, because it requires minimal amount of effort and has a high tolerance for design and build errors.
References
- Loudspeaker Design Cookbook 7th Edition by Vance Dickason (Audio Amateur Pubns, 2005). (Amazon affiliate paid link)
- How to Build Speaker Enclosures by Alexis Badmaieff and Don Davis (Howard W. Sams & Co, 1966). (Amazon affiliate paid link)
- Image source : link.





18 comments
hey im putting together a spread sheet for calculating different types of boxes depending on what ts parameters your woofers have to make it more easy for people out there especially on Mac who don’t have dedicated software to help them and I was wondering if you’d like to share some formulas you use for desinging all different types of enclosures? this thread helped me out a lot thank you for the help so far. you can reach me on the email attached
best regard Hampus
You got all the formulas you need here to calculate sealed designs. I just added the formula for f3, so now it’s complete.
For bass reflex, you can check the bass reflex alignments article. You have an excel spreadsheet with all the speaker values for different alignments, and the formulas you need to manipulate those values.
I wanted to set an awesome stereo system in my car. So I thought to make a subwoofer box at my own, which could come in my budget. But I had no idea at all on how I could build the subwoofer box. After reading your article I can understand how to build a subwoofer box at our own. Here I can read which type of material is used. Thank you for posting this article.
Hi, Great project! Does it matter where the speaker goes – end or side? symmetrical or offset from centre? Thanks!
Doesn’t really matter for subwoofers. Placing it on the side, it does solve some diffraction issues, but for high frequency drivers.
Great, thanks!
Just one thing more: The black graphs on the web pages don’t really show the graph lines very well – would it be possible to draw these as black/coloured lines on a white background instead? Thanks again!
Yeah, I know, it doesn’t show up that great. Open the image individually and zoom in, if you have to.
How did you taken measurement for impedance chart and frequency response in the last? please share the steps. And also needed an article on designing ported boxes. Thanks.
The impedance measurement is taken using the Dayton Audio Test System (DATS v2). And the frequency response measurement is taken using a measurement microphone, also from Dayton Audio, and a Focusrite audio interface. The software used in this article is ARTA, but you can use any audio measurement software.
More for bass reflex here : https://audiojudgement.com/bass-reflex-alignments-explained/
How to measure frequency response : https://audiojudgement.com/measure-speaker-frequency-response/
Can we add a cooling case fan to a sealed enclosure? why/why not?
Thank you
Why would you need a cooling fan? The speakers are designed to handle a specific power rating. If you burned your speaker, it means you exceeded the limitations of the speaker, not that you didn’t provide active cooling. Also, having a cooling fan means that the enclosure is no longer sealed, so you are doing more bad than good.
Author has kept superb unknown ideas, that will help most of music lover. It is not only includes huge ideas but also user friendly with figure-out post. If anybody read this article will reinforce to get this. Thanks a million for this post.
Hi,
Is the outcome of the second calculation in your real life example correct?
fc = 24.9 * (139 / 94.66 +1)1/2 = 39.12 Hz
If I read it as 24.9 * SQRT(139/ (94.66 +1)) I get 30.02Hz
and if I read it as 24.9 * SQRT((139 +1)/ 94.66) I get 30.28Hz
I read the notation such that I expect it to be 30.02Hz
You have to do the division before addition.
fc = 24.9 * sqrt(139 / 94.66 + 1)
fc = 24.9 * sqrt(1.47 + 1)
fc = 24.9 * sqrt(2.47) = 24.9 * 1.57 = 39.09 Hz
The result is a bit off from 39.12 Hz because in this example I rounded to 2 decimals.
Thanks you very much for post, This the best guide post for car audio sound system include details. It is a very effective and helpful share for beginners. Author keeps all think at this share.
Thank you for the formulas. I am looking to do a sealed enclosure with two drivers. I don’t image the final results are simply doubled for the total volume. Do you have separate formulas to calculate that?
Everything is kept the same except for Vas. When you see Vas, you use 2 x Vas (double the Vas value).